
Yes, a 100% cotton hoodie will shrink if you run it through a hot wash and a high-heat dryer cycle, and for most people that’s the only method worth trying first. Blends and preshrunk pieces move less. The risk is real but manageable: prints, trims, and elastane panels don’t always survive high heat, and once cotton fibers relax, you can’t fully undo it, so treat this as a one-way process and measure as you go.
TL;DR:
- Hot wash and high-heat dry will typically shrink an all-cotton hoodie between 2% and 10%, depending on fabric quality and manufacturing treatment.
- Boiling or hot soaking can produce larger shrinkage but risks uneven results, dye bleeding, and damaging embellishments if not carefully monitored.
- For minor adjustments, targeted steam or iron can shrink specific areas like cuffs or sleeves without risking the entire garment.
- Garments with high polyester content or decorated with plastisol prints, vinyl graphics, or glued patches should avoid high heat shrink methods to prevent damage.
- Measuring and tracking dimensions before and after each cycle is essential to prevent over-shrinking and to achieve a precise fit.
Table of Contents
- How to Shrink a Cotton Hoodie: Quick Methods at a Glance
- Hot Wash and High-Heat Dryer: The Step-by-Step Method
- Boiling or Hot-Soak Method for Bigger Size Changes
- Dryer-Only and Targeted Heat: Precision Without a Full Wash
- What Shrinkage Percentage Should You Actually Expect?
- Watch Out for These Decoration and Fabric Risks
- How to Lock In the New Fit and Stop Further Shrinking
- Can You Reverse a Hoodie That Shrank Too Much?
- Why Trust This Guide on Shrinking a Cotton Hoodie
- The Part Most Shrinking Guides Get Wrong
- Sources
How to Shrink a Cotton Hoodie: Quick Methods at a Glance
Before you touch the washer dial, figure out how much size change you actually need. A half size calls for a completely different approach than “I need this two inches shorter in the body.” Here’s how the main methods for shrinking a hoodie stack up against each other.
- Hot wash + high-heat dryer: The default move for most people. Predictable, moderate shrinkage, and it’s the easiest to control because you can check progress between cycles.
- Boiling or hot soak: The nuclear option. Higher shrink potential, but also higher odds of uneven results, dye bleed, or a ribbed collar that puckers.
- Dryer-only method: Milder and gentler on the fabric. Good if you don’t have a washer handy or you only need a small nudge.
- Targeted steam or iron: Not a whole-garment method at all. This is for fixing one sleeve that runs long or a cuff that won’t sit right, without touching the rest of the hoodie.
Fiber content decides how far any of these methods will actually take you. Cotton fibers absorb water, swell, and release the tension woven into them during manufacturing when they’re hit with heat, which is the physical basis for relaxation shrinkage in cotton. Polyester doesn’t do this, so a cotton-poly blend hoodie will shrink less than an all-cotton one, no matter which method you pick. Read the tag before you decide anything else.
If your goal is a full size down, start with hot wash and dryer. If you’re chasing a specific one-inch adjustment on a sleeve or waistband, skip straight to the targeted steam section below. And if the hoodie has a plastisol print, a heat-transfer logo, or a “preshrunk” label, read the precautions section before you do anything with heat at all.
Hot Wash and High-Heat Dryer: The Step-by-Step Method
This is the controlled version of shrinking a cotton hoodie, and it’s the one we’d recommend to almost everyone reading this. It’s repeatable, it’s easy to check on, and it does most of its work in a single cycle.
Before you start:
- Check the care label for fiber content. Anything under 90% cotton will respond weakly to this method; heavy blends may barely move at all.
- Photograph the hoodie laid flat, front and back.
- Measure three things with a fabric tape measure: chest width at the armpit, front length from shoulder seam to hem, and sleeve length from shoulder seam to cuff. Write the numbers down. You’ll need them to know if the shrink actually worked.
- If the hoodie has any colored print or embroidery, test a hidden seam or an old scrap of similar cotton fabric first to see how the color holds up to hot water.
The wash:
- Turn the hoodie inside out to protect any surface printing.
- Set the machine to the hottest water setting it offers, on a regular or normal cycle rather than a delicate one, since a bit of extra agitation helps the fibers relax faster. Washing-machine agitation combined with heat is what actually drives most of the dimensional change, according to research on washing machine mechanics.
- Add a cup of white vinegar to the wash if the hoodie has any risk of dye bleeding onto lighter fabrics in the load. It won’t stop shrinkage, but it helps lock color in place.
- Wash it alone or with similar dark or light garments, never mixed with anything you’re not willing to risk staining.
The dry:
- Move the hoodie straight into the dryer while it’s still hot and damp. Don’t let it air dry first. Heat plus moisture plus tumbling is the combination that does the real work, and the dryer often contributes more to the final shrink than the wash cycle itself, per Modaknits’ breakdown of hoodie shrinkage.
- Set the dryer to its highest heat setting.
- Check it every 10 to 15 minutes. Pull it out, lay it flat, and re-measure chest, length, and sleeve against your original numbers.
- Stop the moment you hit your target measurements, even if that means pulling it out mid-cycle.
Most of the visible change happens in this first cycle. Sanforized, preshrunk retail cotton typically has only 2 to 4% residual shrinkage left to give, while untreated cotton fleece can move 5 to 10% on that first hot wash and dry. Running it through a second time will get you a little more, but the returns drop fast. Three or four cycles rarely does anything beyond what the first two accomplished, and each additional cycle adds wear, pilling, and fading you can’t reverse.
Pro Tip: Do a test run on an old cotton t-shirt or a hidden inside seam before committing the whole hoodie. It tells you how your specific washer and dryer handle heat, since machines vary more than people expect, and a fifteen-minute test beats guessing wrong on a hoodie you actually wanted to keep.
If after two cycles you’re still not where you want to be, and the fabric still feels intact with no pilling or thinning, you can move to the boiling method below for a bigger jump. If the fabric already feels stiff or the print is cracking, stop here. That’s the ceiling for this hoodie.
Boiling or Hot-Soak Method for Bigger Size Changes
Boiling water gets you more shrink than a washing machine ever will, but it also removes your ability to control exactly where and how much that shrink happens. Save this for hoodies with no prints, no bonded trims, and no elastane in the ribbing.
Before you boil anything, check the collar, cuffs, and hem for stretch. If they snap back when pulled, they likely contain a small percentage of spandex, and boiling can distort that ribbing permanently, leaving it wavy or loose instead of tight.
Step-by-step:
- Fill a large pot, or a clean bathtub for a bigger hoodie, with water and bring it to a boil or as close to boiling as your setup allows.
- Turn the hoodie inside out and submerge it fully. Use tongs or a wooden spoon. This water is hot enough to burn skin badly.
- Let it soak for 5 to 10 minutes, agitating occasionally with the tongs to keep the shrink even across the garment.
- Turn off the heat and let the water cool slightly before removing the hoodie, so you’re not handling scalding fabric with your bare hands.
- Wring out excess water gently, don’t twist hard, and move it directly into a hot dryer.
- Run the dryer on high heat and check every 10 minutes, same as the wash method, measuring against your baseline numbers each time.
According to WikiHow’s guide on shrinking cotton fabrics, boiling followed by immediate high-heat drying can shrink untreated cotton by a full size or more in a single session, more than a standard hot wash typically delivers. That aggression is exactly why it’s harder to control.
The risks are specific and worth naming directly:
- Uneven shrink. Thicker seams, hoods, and pocket panels can shrink at different rates than the main body fabric, leaving a slightly puckered or twisted look.
- Rib distortion. Cuffs and waistbands with any stretch fiber can warp instead of tightening cleanly.
- Dye bleed and fading. Boiling pulls more dye out of fabric than a standard wash, especially on darker or saturated colors.
You limit these risks by keeping the soak time short, agitating evenly instead of letting the hoodie sit balled up in one spot, and moving straight to the dryer rather than letting it air dry first, which tends to lock in whatever unevenness happened in the pot.
Dryer-Only and Targeted Heat: Precision Without a Full Wash
Not every shrink job needs the whole hoodie treatment. Sometimes you need three-quarters of an inch off the sleeve or a slightly snugger waistband, and running the entire garment through a hot wash is overkill.
The damp-and-dry method works when you don’t have access to a hot wash cycle or you want something gentler than the full method above:
- Mist or lightly dampen the hoodie with a spray bottle, focusing on the areas that need to shrink.
- Toss it in the dryer on high heat for 10 minute intervals.
- Pull it out and re-measure after every interval.
- Repeat until you reach your target, stopping the moment you’re close, since this method still uses the same heat and moisture mechanism as a full wash, just in smaller doses.
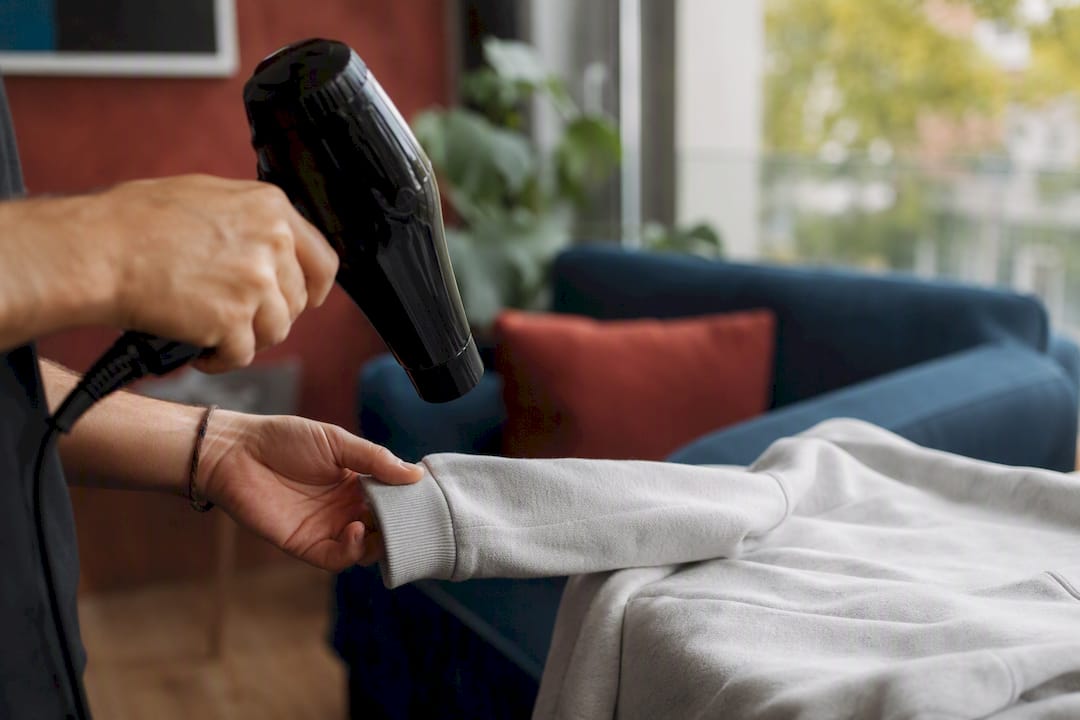
Targeted steam or iron is the better move for sleeve length or cuff adjustments specifically. Dampen just the section you want to shrink, lay a thin cloth over it to protect the fabric, and press with a warm iron in short bursts rather than dragging it across the fabric. As you press, gently push the fabric inward toward the seam instead of pulling it taut. This concentrates the shrink exactly where you want it instead of spreading it across the whole garment, and it’s the method we’d point to first for anyone trying to fix one problem area rather than resize the entire hoodie.
A handheld hairdryer can do the same job on a smaller scale, useful for spot-shrinking a small area like a loose cuff edge. Keep it moving constantly and hold it several inches back from any printed graphic, since concentrated heat is exactly what cracks plastisol ink and lifts heat-transfer vinyl.
Pro Tip: If you’re only adjusting sleeve length, mark the target spot with a safety pin before you start steaming. It’s easy to lose track of exactly how far you’ve shrunk a damp, hot section of fabric once you set the iron down.
What Shrinkage Percentage Should You Actually Expect?
Realistic expectations save you from over-shrinking a hoodie you can’t get back. The type of cotton fabric you’re working with sets a ceiling on how much change is even possible.
| Fabric type | Typical shrinkage on first hot wash + dry cycle |
|---|---|
| Preshrunk (sanforized) retail fleece | 2 to 4% |
| Untreated 100% cotton fleece | 5 to 10% |
| Cotton-poly blends | Noticeably lower, often under 3% |
These numbers come from documented shrinkage ranges for cotton hoodies, and they explain why two people running the exact same wash cycle can get very different results. A hoodie labeled “preshrunk” has already been through a mechanical process called sanforization at the factory, which limits how much more it can move at home. If your label says preshrunk and you’re hoping for a full size down, a hot wash alone probably won’t get you there.
On a hoodie with a 44 inch chest, 5% works out to a little over 2 inches off the total circumference, or roughly an inch off each side seam. That’s often the difference between “baggy” and “fitted” without crossing into “too tight to wear.”
Measure it the same way every time:
- Chest: Lay the hoodie flat, button or zip it if applicable, and measure straight across from armpit seam to armpit seam. Double that number for full circumference.
- Front length: From the highest point of the shoulder seam straight down to the hem.
- Sleeve length: From the shoulder seam, along the top of the sleeve, to the end of the cuff.
Take these measurements before you start, and again after every wash or dry cycle. Consistency in how you measure matters as much as the shrinking itself. If you eyeball it one time and use a tape measure the next, you won’t be able to trust your own numbers.
Watch Out for These Decoration and Fabric Risks
Some hoodies simply shouldn’t go through high heat, and knowing which ones ahead of time saves you from ruining a garment you can’t replace.
High-risk decorations and trims:
- Plastisol screen prints, which can crack, bubble, or flake off under sustained high heat.
- Heat-transfer vinyl (HTV) graphics, which can peel or warp at the edges.
- Glued or bonded labels and patches, which can lift or curl.
- Rhinestone or metal embellishments, which can loosen from heat-softened adhesive.
Manufacturer guidance on hoodie care is consistent on this point: aggressive heat and decorated garments don’t mix well, and the damage isn’t the kind you can patch up afterward.
Label flags that mean you should stop before you start:
- “Preshrunk” or “sanforized” on the tag, meaning you’re working with a small margin already
- Any percentage of polyester above roughly 35%, which resists shrinking regardless of method
- “Dry clean only,” which usually signals a fabric or dye that won’t tolerate hot water or a dryer
- Elastane or spandex content in the ribbing, waistband, or cuffs, which can distort rather than tighten under high heat
If your hoodie hits two or more of these flags, don’t run it through boiling water or repeated hot cycles hoping for a different outcome. The realistic alternatives are a tailor for a proper fit adjustment, an exchange with the retailer if it’s still returnable, or simply buying the correct size next time. A cracked print or warped cuff isn’t fixable, and there’s no version of “try it anyway” that ends well on a heavily decorated garment.
How to Lock In the New Fit and Stop Further Shrinking
Once you’ve hit the size you want, the goal flips completely: stop the shrinking process before it goes any further.
- Switch to cold water for every future wash. Cold water doesn’t trigger the fiber relaxation that hot water does, so the size you’ve landed on stays put.
- Air dry when possible, or use the lowest heat setting your dryer offers if you need machine drying.
- Skip fabric softener on cotton fleece specifically, since it can break down the fibers’ texture over repeated washes and shorten the garment’s overall life.
- If you send it to a professional cleaner, tell them explicitly: cold water wash, low or no heat dry. Don’t assume they’ll default to gentle settings on their own.
- Store it folded rather than hung. A hoodie left on a hanger for months can stretch back out at the shoulders and collar from its own weight, quietly undoing some of the work you just put in. For more on this, Thepreciouslamb’s guide on storing hoodies covers folding methods that protect shape long term.
Pro Tip: Wash it inside out from now on, every time. It reduces surface friction on the outer fabric and print, which matters even more now that you’ve already pushed the garment through one or two aggressive heat cycles.
Can You Reverse a Hoodie That Shrank Too Much?
You can partially undo an over-shrunk hoodie, though “partially” is the honest word here. Cotton fibers that have fully relaxed under heat won’t return to their exact original state, but a soak-and-stretch approach can recover a meaningful amount of size.
- Fill a basin with lukewarm water and mix in a few tablespoons of hair conditioner or baby shampoo. Skip hot water this time, since you’re trying to relax the fibers gently, not shrink them further.
- Submerge the hoodie and let it soak for 15 to 20 minutes, giving the conditioner time to soften the cotton fibers.
- Remove it without wringing, and lay it flat on a towel.
- While it’s still damp, gently pull and stretch the fabric in the direction you need it to grow, chest width, length, or sleeves, working a little at a time rather than yanking hard in one spot.
- Pin the stretched fabric to a towel or a foam board using rust-proof pins, holding it at the stretched dimension while it air dries completely. This can take 24 hours or more.
- Check the measurement once dry. If you need more length or width, repeat the soak and stretch process, since this is a gradual recovery rather than a one-shot fix.
For stubborn areas, a garment steamer or the steam function on an iron, combined with manual stretching while the fabric is warm, can loosen fibers further before you pin and dry again. If the hoodie is a piece you genuinely care about and the shrink was significant, a tailor experienced with knitwear can sometimes ease seams or add small panels to recover fit in ways a home stretch can’t match.
Why Trust This Guide on Shrinking a Cotton Hoodie
This guide comes from Thepreciouslamb’s ongoing work with cotton fleece and knit garments, where fiber behavior under heat isn’t theoretical, it’s the difference between a hoodie that fits right off the shelf and one that needs adjusting. Thepreciouslamb’s own care guidance, including the hoodie storage piece covering folding and closet care, reflects the same underlying principle covered throughout this article: cotton responds to heat, moisture, and handling in predictable ways once you understand the mechanism.
Every product page on Thepreciouslamb lists the specific fabric blend and care instructions for that garment, which matters more than generic advice once you’re deciding whether a specific hoodie is a good candidate for shrinking at all. A hoodie listed as 60% cotton and 40% polyester will behave very differently in a hot wash than one listed as 100% cotton fleece, and checking that label before you start is the single most useful five seconds you can spend on this whole process.
This article was written by Joshua, drawing on documented fiber science and manufacturer guidance rather than guesswork, with an emphasis on giving readers measurable checkpoints instead of vague promises about “shrinking it down a size.”
The Part Most Shrinking Guides Get Wrong
Most guides on this topic treat shrinking a hoodie as a single event: wash it hot, dry it hot, done. That framing sets people up to either under-shrink out of caution or blow past their target because they didn’t check in along the way. The single biggest lever isn’t which method you pick. It’s whether you measure between cycles instead of guessing.
Boiling gets recommended too casually online, treated as just a stronger version of a hot wash. It isn’t. It’s a different risk category entirely, and it should be reserved for plain, undecorated cotton where a full size change is the goal, not a first attempt for someone who just wants a slightly snugger fit.
If I had to boil this down to one piece of advice: measure before you start, measure after every cycle, and stop the instant you hit your number. That habit alone prevents more ruined hoodies than any specific technique in this guide.
— Joshua
Sources
- How to Shrink a Cotton Hoodie: Steps, Temperatures, and Realistic Shrinkage %
- How to Shrink Cotton Fabrics
- How Will a Hoodie Shrink If You Wash It? - Clothing Manufacturer - Modaknits Apparel
- How to Shrink a Hoodie: A Safe, Step-by-Step Fabric Care Guide - Goal Sports Wear
- Cotton — Wikipedia